After almost two years running a single Reln Worm Factory (equivalent to Worm Factory 360), I, one day, posted a wanted message on a local Freecycle group and got a donation of two other Reln Worm Factory farms, two Tumbleweed Can-O-Worms and one Tumbleweed Worm Cafe, three of which contained healthy red wigglers. One of the donated farms were contaminated with Blue Indian worms (Perionyx Spenceralia) which are reputed for their temperamental character and would mass exodus every time something is to their dislike. Luckily, I never had issues with them and had started to really like their voracious appetite and speedy breeding cycle. If you want to know more about these "Blue Worms", check this awesome digital guide called Rogue Wigglers"
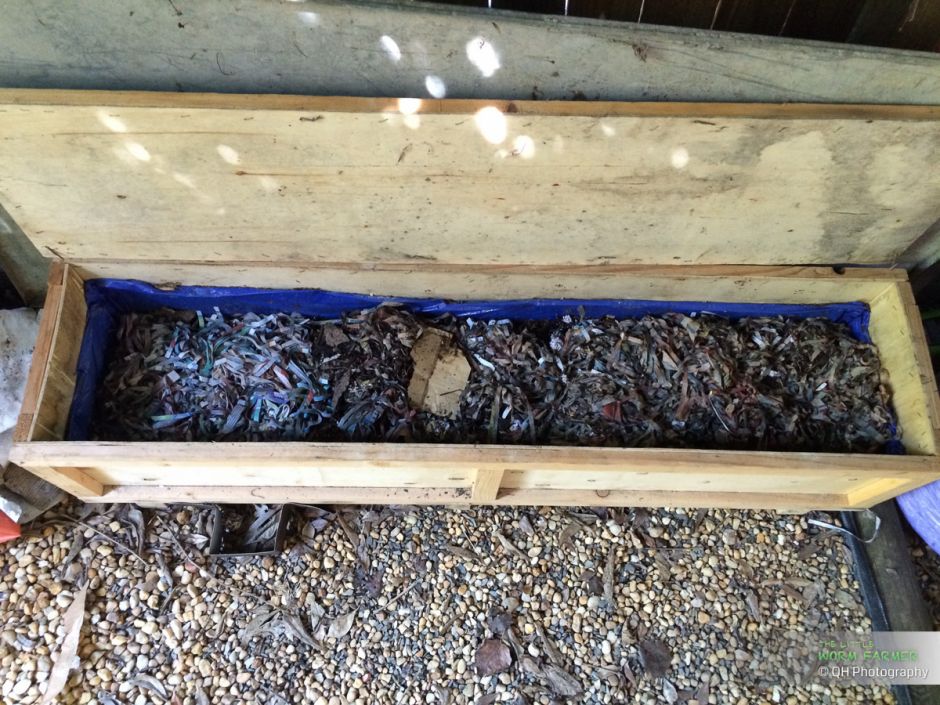
With 2 more Worm Factories given by a friend and a wooden crate converted into a horizontal migration worm bin, I ended up with 9 worm farms. Feeding them all twice a week was not bad but definitely an effort compared to one or two farms. So after few months, I decided I wanted to try a CFT (Continuous Flow Through) worm bin, and with the help of my father and my 4 year old boy, I built a wooden CFT out of salvaged pallet wood and I called it Gargantua.
I will migrate the content to this website in the future, but meanwhile, check my previous Facebook post about Gargantua: Gargantua, the CFT worm bin, you can also watch some of the videos in the resources section.
Gargantua, my CFT worm farm, is running very well. Maintaining a larger farm is easier than smaller systems. However one little issue with a CFT is that you need to wait between 12 and 24 months for it to be full in order to safely start a regular harvest process. In the mean time I needed something that provides me a faster return so I can do some good to the garden. So I have been running two Worm Factories and one wooden horizontal migration bin. But for these I still need to wait four months for an ideal and safe compost.
Is there any other methods that could help while not taking too much effort on the maintenance? Searching the web, I stumbled on two candidates:
As you may already know it, earthworms don't have eyes but still can sense light. Their skin have light sensitive cells allowing them to go and hide away in the bedding when the light is shining on them, usually meaning the sun is up and could kill them. This is a survival instinct and that is why they all dive down as soon as you take out the lid and let the light in.
A lot of us are considering our compost worms our pets and love to fluff the bin, dig here and there to see if our proteges are doing well. Even though this is not advised as it decrease the performance of the worms (each time you disturb them, they stop doing what they are suppose to do: compost the food scrap), we sometimes need to check on them. There is away to check on our worms without disturbing them too much, this is using a red light.
I started this experiment on April 16th 2016. The plan was to see how the ENC would do in different bedding/food mix. The success of the experiment would not necessarily be a succesful breeding but rather learn from mistakes and the repetitive tasks such as maintenance tasks on the small trays the the monthly count of worms and cocoons.
The experiment has been setup with three plastic trays of 1 sqft of surface area and of a depth of about 4.5 in. Each tray would host 10 mature ENC ready to breed:
The first tray contained a mix of cardboard and horse manure
The second tray contained shredded cardboard and food scraps
The third tray contained coco coir and food scraps
The process:
Multiple times a week food (on tray #2 and #3) and moisture is to be monitored. Actions are to be taken whenever necessary
Once a month a count is to be made: mature worms, juveniles, babies and cocoons
The process of counting would also help aerating the bedding
Validity of the expermiment
Soon after the first count, I realised that the experiment is not valid for tray #2 and #3. The bedding mix has not been done properly and was lacking of nutrient and protein (thanks Larry J. Shier). I was still in the vermicomposting mind setinstead of a vermiculture one, still thinking of feeding the worms their weight in food per week. As such the amount of food was too little, diluted in a relatively large amount of bedding.
So although the experiment and the results were still interesting, IMHO, it was however unfair to declare those mixes as of low performance for breeding worms. Given a better bedding mix preperation I'm pretty sure these trays would perform well.
Additionally, running experience right before winter was also a bit of a mistake. Although I kept the trays in the former office room right next to garage, the ambiant temperature would still be ranging between 10 and 16 degrees Celcius.
I've been planning to replace my current horizontal flow bin made of an plywood storage crate. It has worked wonderfully however being only 27cm (10in) wide I thought I could use more surface area.
So I started to take what ever wood scrap I could find and tried to build a single compartment worm bin. After measuring and cutting I started the base and suddenly realised that in my various change of mind I got mixed up and ended up with something different than what I had in mind, lol. But it wasn't too bad, I can fix it, it will just take a bit more wood than initially required.
The final bin should have a inner dimensions of 70.5 x 79 cm (27.7 x 31.1 in) which is about 0.56 sqm (6 sqft). That should be able to host up to 5.44kg (12lbs) of red wigglers in ideal conditions or an average of 4.08kg (9 lbs) of worms.
I got these styrofoam boxes from a large fruits & vegs shop in Erina, NSW
Wooden worm bin are awesome, you can get the material for free, they breathe much better than other materials such as plastic, however you need to put quite a bit of effort. There is the material gathering, the tools to cut and build the bins, if you want to use the bin for a long time then you need to treat the wood so it won't rot too quickly.
A lot of domestic worm farmer are using plastic tote from hardware store to make worm bins and that work fine. But I like styrofoam boxes, they are light, easily cut and provide some good thermal insulation.
Like for all worm bin you need to keep in mind few basics requirements:
surface area of the bin: if you intend to grow many worms to process a good amount of food, then surface area is the primary point. Worms self-regulate their population mainly based on the surface area and food available.
depth of the bin: this does not affect too much on the number of worms you can grow in the bin, but in a bin made of non/less breathable material such as plastic the depth of the bin can affect the moisture retention of the bin: only the top few inches of the bedding will breathe properly allowing evaporation of excess moisture, the bottom of the bin will retain moisture too well and that excess moisture will create an anaerobic environment that could lead to killing the worms.
drainage: if you are a beginner, having drainage holes is important to allow excess water to escape the bin. The drainage holes will also act as ventilation holes at the bottom
ventilation/aeration: a composting process requires a good amount of oxygen to perform properly, so a well ventilated/aerated bin is critical. Worms don't have nose but they absorb oxygen thru their skin. See the three most common beginner mistakes for more details.
protection against weather/critters: depending on your situation you might want to have a lid on your worm bin. For an outdoor bin the lid would provide darkness, protects from too much rain getting into the bin, protects from predators such as birds. For an indoor bin, the lid will help keeping bugs away from the food source preventing them to breed inside the bin.
All you need to start and maintain a worm farm. Pauly "DrWorm" Piccirillo has made a wonderful job of writing an easy to read guide that will help worm farmers of all levels.
CFT worm bins are easier to run & harvest than regular plastic stacking bins. But due to their slow start (one year before first weekly harvest), building it properly from start is important.